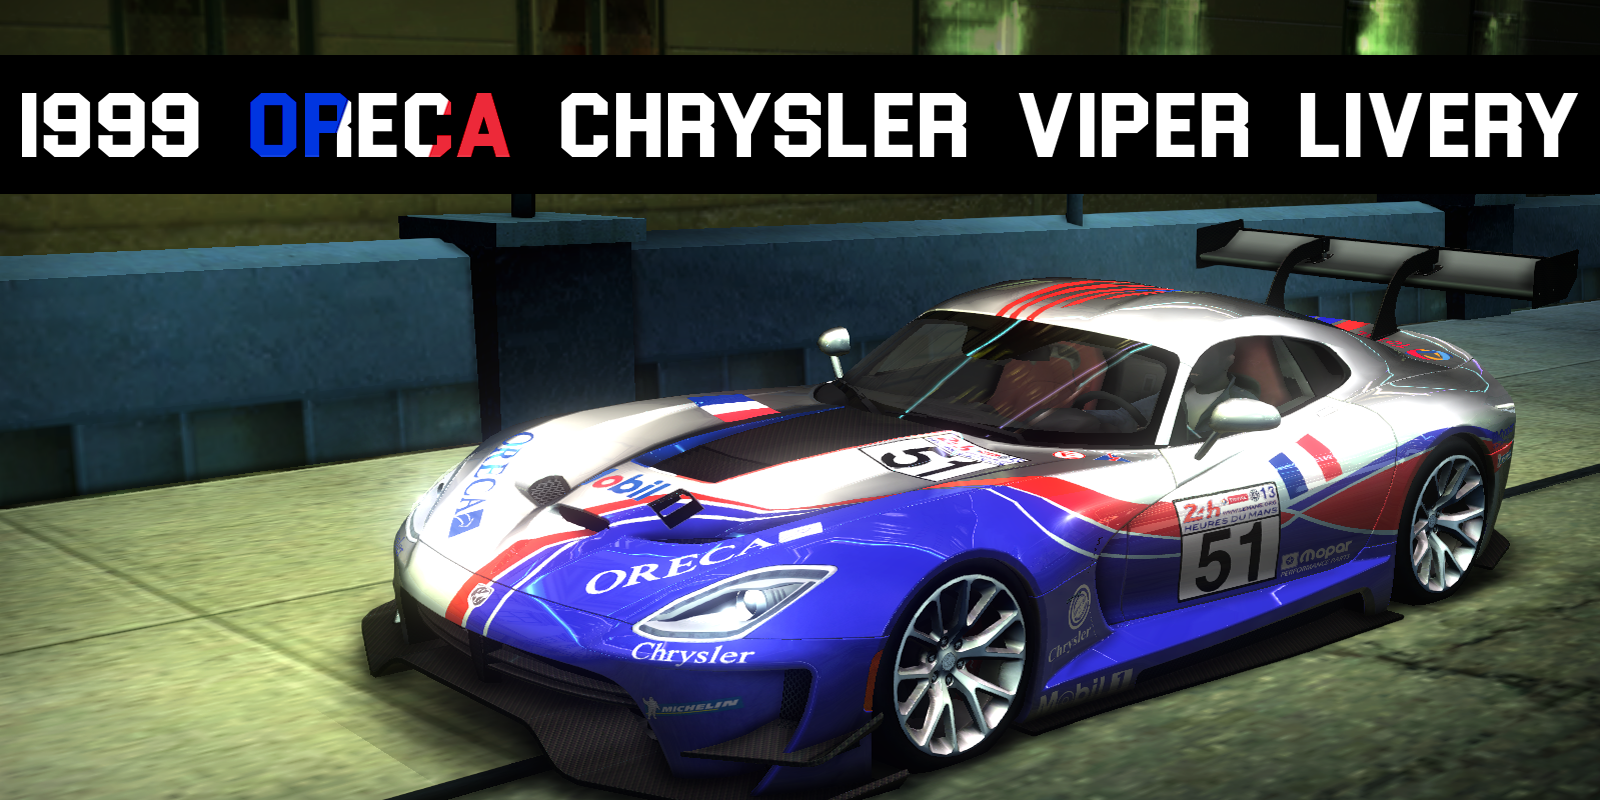
1999 Oreca Chrysler GTS-R livery for 2013 Dodge Viper GTS (Colourable)

v1.1 only has the vinyl and not prepared files, its for manual installation keeping the download size minimum... 1 MB
________________________________________________________________________________________________________________________________________________________
1999 Oreca Chrysler GTS-R livery for 2013 Dodge Viper GTS
The Vinyl took me a lot of time to make as it was made from scratch, please do not upload this anyware else without my permission, If there is any bug or glitch please go through Readme.txt once more. If the error still continues, message me on Discord ( Vicius#1905 ). Thank you
________________________________________________________________________________________________________________________________________________________
Original Car Model by Eclipse 72rus aka CorvetteZ06
Link: https://www.nfscars.net/need-for-speed-carbon/8/files/view/13548/
________________________________________________________________________________________________________________________________________________________
TOOLS REQUIRED :
TexED by nfsu360 : https://nfs-tools.blogspot.com/2019/08/nfs-texed-v17-released.html
ThirteenAG's Ultimate ASI Loader : https://github.com/ThirteenAG/Ultimate-ASI-Loader/releases
NFS Carbon Extraoptions by NLGZRGN and ExOpts team : https://github.com/ExOptsTeam/NFSCExOpts
Maxhwoy's Binary Editor : https://nfsmods.xyz/mod/1638
________________________________________________________________________________________________________________________________________________________
NOTE : BEFORE INSTALLATIONS PLEASE MAKE BACKUPS
INSTALLATIION :
________________________________________________________________________________________________________________________________________________________
1. Open Binary editor
2. Select Modder mode
3. Go to GLOBAL>Global.Ibz>DBModelParts>Vinyls_Generic
4. Now as you select Vinyls_Generic, click on "Open Editor" or just double tap on the "Vinyls_Generic" option
5. Now you will find different fields. Now on the bottom there will "TFK"
6. Select the TFK design and now on the top left of the Binary window will be the option "Car Parts"
7. Click on it while having "TFK" selected and now click on "Copy Part" or just press Ctrl + C having TFK selected
8. There should be an additional "TFK" created
9. Now, you should see a small black " + " sign in a white squre next to the TFK, click on it
10. Now once your double click on it, it should open 5 different fields
11. 4 of the 5 fields will have "TFK" name. The fields are "TEXTURE_NAME" , "NAME_OFFSET" , "PART_NAME_BASE_HASH" , "TEXTURE"
12. Click on each of them and they will all still have "TFK" in the "Value" slot. We take the vinyl named "ORECAVIPER"
13. Now what you need to do is, click on the "TFK" names writtin along the "Value" in the top right box and rename all "TFK" to "ORECAVIPER"
14. Once you have renmaed all 4, just press that cross sign on the binary editor window to exist the editor mode
15. Now you need to click on "Main" located in top left of Binary window and select "save files". Or just press Ctrl + S
16. Now you have successfully created an additional vinyl slot, now we need to add our texture to it.
17. Now open the file "GENERIC_ORECAVIPER.png" located in "(HARD WAY). Extract it to your dekstop
18. Now open TexED 1.7 and open the file PRECOMPVINYLS.BIN located in *Your Carbon Dictionary* > CARS > PRECOMPVINYLS folder
19. Now once its loaded, all you have to do is click Texture located on the top left of the TexED window and then select "Add", or simply press Ctrl + A
20. Now select the texture you extracted on the dekstop
21. Once it has been added, you will see the name "GENERIC_ORECAVIPER". If you don't see it, manually rename it to "GENERIC_ORECAVIPER" by pressing Ctrl + R. For more info on this, read the txt file named "names" in "vinyl" folder in mod win rar archive.
22. Now you need to press Ctrl + F to change its format from whatever it is to DXT1, as it takes the least space and loss of quality isn't much.
23. Once done, press Ctrl + S to save the file
24. You have now saved the vinyl
25. Follow this tutorial to know how to obtain it and put it on your car : https://youtu.be/OxZh6AGqprM
26. Enjoy :)
________________________________________________________________________________________________________________________________________________________
Thanks to
Desanosan : Additional Texture importing process support
Eclipse72rus : Mesh and UV map and the best V12 Vanatage GT3 bodykit ever
NLGZRGN : ExtraOptions for Carbon
nfsu360 : TexED 1.7
Maxhwoy : Binary Editor
Google : For additional Textures
GT Sport Decal Search : Various aftermarket decals
You - For supporting the mod :)
The NFS community - Motivation and Support
________________________________________________________________________________________________________________________________________________________
Additional Tools Used :
Photoshop CS6 : Decals and positioning support, thumbnail
________________________________________________________________________________________________________________________________________________________
Thank you :)
________________________________________________________________________________________________________________________________________________________
Screenshots :


